Showing posts with label Keith Garvey. Show all posts

Tuesday, December 31, 2013

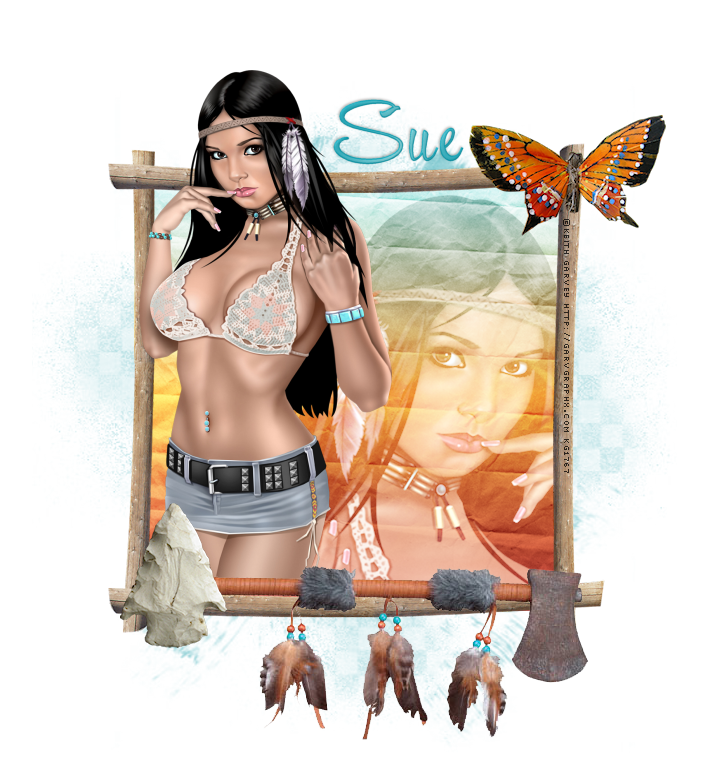
2014 Party

 photo 2014party.png
This tutorial was written by me and for those
who have a good working knowledge of psp.


Supplies Needed


Tube
Artwork by 
©Keith Garvey

Font
Consolas


Scrap


Okay, let's get started
Remember to save often!!!


Open new canvas 800 x 800
Crop when tag is finished
Paste frame 158
Click inside frame with magic wand
Expand by 5
Invert
Paste paper 21
Delete
Paste tube
Duplicate
Delete on bottom tube
Select none
Move bottom tube and paper below frame
On top tube crop bottom of tube

Now add elements from kit

I Used
55
57
62
86
89
192 + noise at 50


Add name
I applied noise at 50 to mine
Add copyright info

Crop & Save

Thursday, November 21, 2013

Pink Ice

 photo pinkice.png
This tutorial was written by me and for those
who have a good working knowledge of psp.


Supplies Needed


Tube
Artwork by 
©Keith Garvey
Font
Admiration Pains 

Cluster Frame
(PUT) Pink Ice Cluster 2 by Tiny Turtle Designs
Made using Pink Ice Kit

Filter
Filters Unlimited - Paper Texture

Mask
Winter #9 by Dee


Okay, let's get started.
Remember to save often!!!


Open new canvas 800 x 800
Crop when tag is finished


Fill layer with color of choice
Add texture if desired - I used Fine Leather
Apply mask
Merge group

Paste cluster frame 18

Using preset shape circle set to color of choice
Draw out a circle bigger than opening of each frame
Convert to raster layer
Apply FU paper texture if desired
I also added snow flake texture from my texture files

Float the bg you made using circles
Invert
Paste tubes
Delete
Invert
Add new layer
Fill with texture pattern of choice
Select none
Change blend mode to hard light on texture pattern layer and lower opacity to 80 or however you like yours as you are using different than me

Add name
I applied inner bevel to mine

Add copyright info

Crop & Save

Sunday, June 23, 2013

Spoiled Princess

 photo spoiledprincess.png
This tutorial was written by me and for those
who have a good working knowledge of psp.


Supplies Needed


Tube
Artwork by 
 ©Keith Garvey

Font
Carlotta

Filter
Eye Candy 5 Impact - Gradient Glow

Scrap Kit


Okay, let's get started.
Remember to save often!!!


Open new canvas 800 x 800
Crop before final saving

Paste frame 1
Use selection tool  and make rectangle larger than frame opening
Invert
Paste paper 5
Delete
Paste tube
Delete 
Select none
Change color of paper to match tube
Change tube to blend mode luminance (L)

I duplicated frame and applied gradient glow to bottom frame but this is up to you


Paste tube and place on right side of frame

Now add elements

I used
castle 
crown
key
ribbon (colorize to match)
glitter 1 and 2

Use my tag as guide if needed

Add name

Add text if desired

Add copyright info

Crop and Save

Wednesday, January 30, 2013

Sprinkles


 photo Sprinkles_zps84ca229f.png
This tutorial was written by me and for those
who have a good working knowledge of psp.


Supplies Needed

Tube


I used artwork by ©Keith Garvey

Font

KG Eyes Wide Open

Mask

I used Grungi 10 by Sharon at Creative Misfits

Filters Used

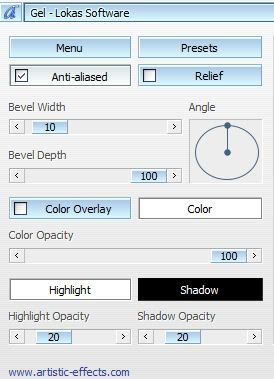
Lokas - Gel
Eyecandy - Gradient Glow


Okay, let's get started.

Remember to save often!!!

For this tag we are going to use items from folders PD, PDS, and SB

Open a new canvas 800 x 700

Use my tag for guide if needed

Paste PDS paper 05
Apply mask
Merge group

Paste PDS frame 4

Using selection tool - circle draw out a circle just smaller than the frame
Invert
Paste PDS paper 6
Delete

Keep selected and paste tube
Delete
Select none

Paste SB print 2
Center in circle area and move below tube 

Paste PDS note
Move to bottom left area

Paste PD heart 01
Move it to bottom left but right of the note

Paste SB Candy 2
Move to left bottom area
Duplicate
Rotate by 90 degrees right
Move to bottom of circle 

Paste SB cupcake 3

Paste SB love bug

Add name
I used gel effect and gradient glow
3,25,100,white

Add copyright

Save as PNG


See the Love


 photo Seethelove_zpsff645b2c.png
This tutorial was written by me and for those
who have a good working knowledge of psp.


Supplies Needed

Tube


I used artwork by ©Keith Garvey

Font


MTF Kim


Filters Used


Lokas - Gel


Okay, let's get started.

Remember to save often!!!

For this tag we are going to use items from the Alikas (as) folder

Open a new canvas 700 x 600

Paste paper 1 
Apply mask
Merge group

Paste heart frame and mirror

Using selection tool select area bigger than opening of heart frame
Invert
Paste paper 09
Delete

Paste tube and duplicate
On bottom tube hit delete
Select none
On top tube erase anything over the heart at bottom

Paste double heart and move to right bottom area

Paste any other elements from this kit or any of the other kits in the collab

Add name
I made gradient of the colors in tag and applied a gel to my text

Add copyright

Save as PNG

Monday, December 31, 2012

It's Midnight Somewhere


Photobucket
This tutorial was written by me and for those
who have a good working knowledge of psp.

Supplies Needed

Tube, I used artwork by ©Keith Garvey.
Scrap kit, I used (PTU) Party of the Year  by  Pimp'd Designz
Font of choice, I used Sheila for name and PMingLiU for HNY.

Let's Begin!

Paste frame 02 and re-size canvas to 800 x 800.

Using selection tool select just inside opening of frame and invert.
Paste paper 01 and hit delete.

Paste clock 01
Paste male tube and change blend mode to multiply and lower opacity to 70.
Select tube and float
Now go to clock tube and hit delete.

Paste female tube and position her at edge of frame. 

Paste elements of choice.
I used hat, noise maker and champagne.

Now paste the confetti and duplicate.
Move one to top frame area and one to bottom frame area
Merge together and move to bottom

Once you have tag how you like it then it's time to add the Happy New Year
text using a color of choice. I used a silver gradient.
Type text and duplicate and position where you like you 
will need to rotate 90 degrees left and right for the sides.

Add name 

Add copyright info.

Crop tag.

Save.


Friday, November 23, 2012

Native Beauty


Photobucket
This tutorial was written by me and for those
who have a good working knowledge of psp.

Supplies Needed

Tube, I used artwork by ©Keith Garvey.
Scrap kit, I used (PTU) Native Beauty by  Pimp'd Designz.
Font, I used Kon Tiki Enchanted JF.
Mask, I used #349 by Vix

Let's Begin!

Open new canvas 700 x 600

Paste paper 4
Apply mask
Merge group

Paste frame 4
Using selection tool select just outside of frame opening
Invert
Paste paper 10
Delete
Paste close up tube
Delete

Duplicate paper 10 you have and move above tube
Change blend mode to screen

Paste tube

Paste elements of choice

Add name

Add copyright info

Save

Monday, November 19, 2012

Sexy Xmas


Photobucket
This tutorial was written by me and for those
who have a good working knowledge of psp.

Supplies Needed

Tube of choice, I used artwork by ©Keith Garvey.
Scrap kit, I used (PTU) Sexy Xmas Mini by Designs by Sarah
Font of choice, I used Janda Apple Cobbler Solid.

Let's Begin!

Open  new canvas 700 x 700.

Paste paper 2
Apply mask
Merge group
Change opacity to 85 or where ever you like it

Paste frame  2

Using magic wand click inside frame
Expand by 10
Invert
Paste close up tube
Delete

Paste regular tube
Duplicate
Delete on bottom tube
Select none
Crop bottom part on top tube
Move bottom tube below frame

Paste elements of choice
I used tree, hat, and snow flake which I applied noise too.

Add name
I used paper 3 as pattern

Add copyright info

Save

Friday, October 26, 2012

Pretty -n- Pink


This tutorial was written by me and for those
who have a good working knowledge of psp.

Supplies Needed

Tube of choice, I used artwork by ©Keith Garvey.
Scrap kit, I used (PTU) Artist Series KG 04 by Pimp'd Designz
Font of choice, I used Aphrodite Slim Contextual.
Mask, I used #25 from Weescotslass Creations.
 Optional Filter, I used Lokas Software - Gel.

Let's Begin!

Open  new canvas 800 x 700.

Paste frame 02.
Using magic wand click inside frame and expand by 3.
Invert
Paste paper 06.
Hit delete.

Paste paper 04.
Apply mask.
Merge group.

Paste ribbon 01 and place to the right bottom area.

Paste heart frame.
Click inside both hearts.
(hold shift key when clicking with wand)
Add new layer.
Fill with colors of choice.
I used colors from color pallet that's in scrap kit.

Apply noise to this at 10.

Paste heart and place in middle of other hearts.

Paste ribbon 03 and re-size so small and place 
in middle of the middle heart.

Look at my tag if needed.

Add name.
I used gel effect on mine.
Photobucket

Add copyright info.

Save.


Sunday, October 14, 2012

Sk8er


Photobucket
This tutorial was written by me and for those
who have a good working knowledge of psp.


Supplies Needed


Tube of choice, I used artwork by ©Keith Garvey.
Scrap kit, I used (PTU) Sk8er 4 Life by Skulliez Skrapz
Font of choice, I used "Urban Calligraphy".
Mask, I used #81 from Weescotslass Creations.

Let's Begin!

Open chain link fence frame into psp.
Shift D
Close original.

Add new layer and move to bottom and select all.
Copy paper 8
Paste into selection.

Re-size canvas 700 x 600

Paste paper 1 and apply mask.
Merge group.
Move to bottom.

Add tube.
Move below frame layer.
I duplicated so head was out of fence but up to you on this.
Change blend mode to luminance (L).

Paste any other elements of choice.

I used star 1,skate board 2, 
silver stars 1 and 2 and paper 6.

Add copyright info.

Add name.

Save


Friday, September 28, 2012

Strike -a- Pose


Photobucket
This tutorial is for those with a good working
knowledge of psp and was writen by me.

Supplies Needed

Tubes, I used artwork by ©Keith Garvey.
Scrap kit, I used FTU Designers Choice by Designs by Sarah
Font of choice, I used Shoebop.
Mask, I used #39 from Weescotslass Creations.

Let's Begin!

New canvas 700 x 600.

Paste camera and film strip.


Using magic wand click inside openings

of file strip.
Modify - expand by 5.
Invert
Paste paper and hit delete.

Keep selected and paste tubes as well.


Paste large tube and crop as you like.


Paste paper 4 and apply mask.

Merge group.

Add name.

I used paper 2.

Add copy right info.


Save.