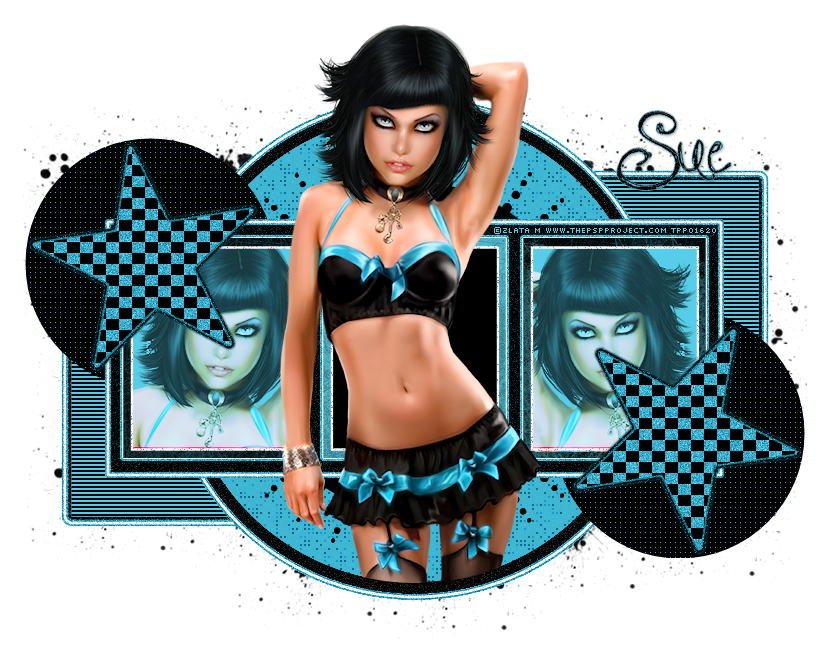
This tutorial was written by me and for those
who have a good working knowledge of psp.
Supplies Needed
Tube
Tube
Template
Filters
(Optional)
Photo Effex - Scanlines
Lokas Software - Gel
(Optional)
Photo Effex - Scanlines
Lokas Software - Gel
EyeCandy5 Impact - Gradient Glow
Okay, let's get started.
Remember to save often!!!
Open template and shift D
Close original
Delete info layer
Re-size canvas to 800 x 800
These are the basic steps you will need to follow
1. select layer
2. float layer
3. add new layer
4. fill new layer with color
5. apply filter or texture
6. close original layer or add gradient glow to layer
Begin with bottom layer and work up.
Merge purple squares together
Do steps above and fill with #57cee9
Apply scan lines color black
Spacing 3 thickness 2
Apply gradient glow to original layer
Go HERE if you aren't familiar on my way of adding gradient glow using EC 5 Impact
Add noise at 30
Add gradient glow to black circle then noise
Colorize your pink circle to match your tube
For white circle do steps and fill with black
Merge purple circles together and do steps
filling with black
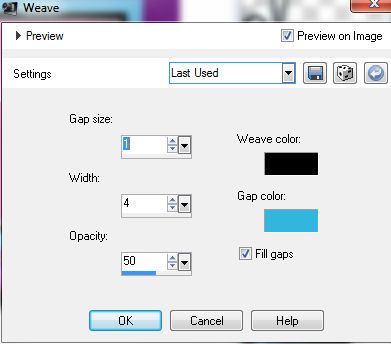
Then go to texture effects - weave
On blue rectangle do steps and fill with black
then apply gradient glow and add noise
Select three squares pink middle layer
and do steps
The only thing that changes is pink to #57cee9
Now using a texture, fill with the opposite color
So black will have slight texture of blue and blue will have slight black
Texture I used is HERE
Apply gradient glow
Now on the next set of three with black in middle
Do steps and where the pink is change to #57cee9
and use black where it is
Invert
Paste tube
Crop
Select none
Duplicate tube and mirror
Line up so it fits both the right and left side boxes
Merge together
Change to Hard Light blend mode and 75 opacity
Select star layer
Do steps and fill with #57cee9
Move layer below star layer
Change star layer blend mode to luminance (L)
Select the top star layer and do steps
filling new layer with #57cee9
Change blend mode on this layer to multiply
and leave original open
Paste tube
Select pink circle layer which should now be blue
Float
Invert
Duplicate tube
On bottom copy hit delete
On top copy crop the bottom of tube
Merge tubes together
Go to bottom layer and add new layer
Using a splatter brush
go around tube and paint edges with a splatter of black
Splatter brush I used is HERE
Add name
I used #57cee9 as foreground .5 stroke width
and black background
Apply noise
Apply gel effect and drop shadow
Add copyright info
Close white bg layer
Crop & Save


No comments:
Post a Comment