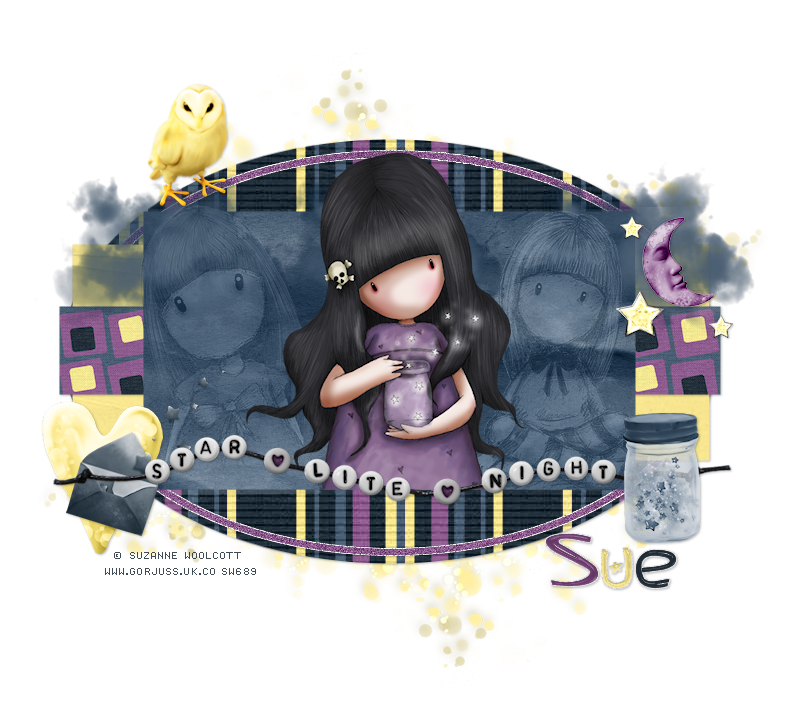
This tutorial was written by me and for those
who have a good working knowledge of psp.
Supplies Needed
Tubes of choice, I used artwork by ©Suzanne Woolcott.
Scrap kit, I used (PTU) Star Lite Night by Alika's Scraps
Let's Begin!
Open my supplies and shift D
Close original
Delete info layer
copy the silver pattern and paste as new item in psp
Minimize for now
Delete silver patter from template
Select the oval layer and float
Invert
Paste paper 4
Delete
Select silver frame
Float
Invert
Paste paper 8
Invert
Add noise at 20
Expand by 1
Add new layer
Fill with silver pattern
Select none
Move below other frame
Add drop shadow
Select pink rectangle
Float
Invert
Paste paper 9
Delete
Select gradient rectangle
Float
Invert
Paste paper 6
Delete
Select hot pink rectangle
Float
Invert
Paste paper 1
Delete
Add tubes
I used three tubes and on the ones that are to left and right changed
blend mode to luminance (L) and opacity to 25
Add tubes
I used three tubes and on the ones that are to left and right changed
blend mode to luminance (L) and opacity to 25
Time to start adding elements from kit
Use my tag as guide for placement
Paste element 26
Duplicate
Flip
Move one to top area and one to bottom
Merge together
Move to bottom
Paste element 30 and do the same as above
Paste element 23 and move to top left
Paste element 25 and move to bottom right
Paste elements 22 and 27 and move to bottom left
Paste elements 3,16, and 24 and move to right top
Duplicate element 16 and move to left and middle top
Paste element 1 and move to bottom center
Paste any other elements of choice
Add name
I changed each color from tag
by highlighting each one before applying changes
Then I did the same outline like the frame to my name
Add copyright
Save
by highlighting each one before applying changes
Then I did the same outline like the frame to my name
Add copyright
Save


No comments:
Post a Comment