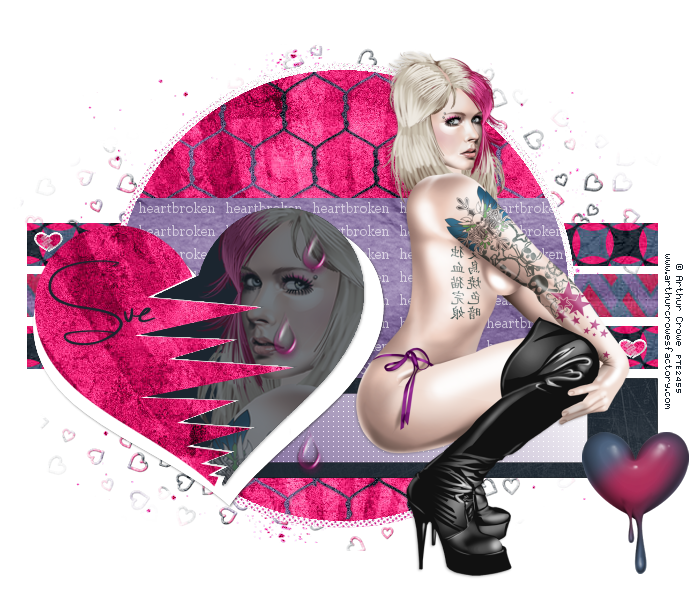
This tutorial was written by me and for those
who have a good working knowledge of psp.
Supplies Needed
Tube of choice, I used artwork by ©Arthur Crowe.
Scrap kit, I used (PTU) Heart Breaker by Alika's Scraps
Font of choice, I used
Template, I used Template by Caro at Creative Misfits
Plug-In : Penta : Color Dots
Let's Begin!
Open template and shift D.
Close original.
Delete info and over you text
Delete info layer and word art and rectangle rows and dots layers.
I re-sized my canvas to 800 x 800
to give me more room and cropped when I was done
but this is totally up to how you like to do it.
There are a few basic steps for this template that are repetitive.
1. Select layer
2. Float
3. Invert
4. Paste paper
5. Hit delete
6. Close original layer
I like to start at bottom layer and go up.
Rectangle 1,2,3 - papers 4 and 5
Circle - paper 1
Paste element and re-size
Delete
I colorized mine so it showed better
Overlay - paper 3
Nameplate - gradient of #9d8cb2 and #d8d2e1
Apply color dots distance 5
Frame nameplate - new layer filled with #2b353e
Add another layer and fill with texture using #ab9cbd
My texture is HERE.
Heart back - new layer filled with white
Heart broken right - new layer filled with #2b353e
Paste tube
Delete
Change opacity of tube to 40
Heart broken left - paper 1
Hearts small - float then contract by 1
Invert
Paste paper 1
Delete
Paste element 61
Move to bottom right
Paste element 77
Duplicate so your canvas is covered
Merge together
Apply mask of choice
Paste tube
Add name
Add copyright
Save


No comments:
Post a Comment