

This tutorial was written by me and for those
who have a good working knowledge of psp.
Supplies Needed
Tube of choice, I used artwork by ©PinUpToons at CDO.
Font of choice, I used MTF Whimsy and Origins.
Tag Template,#38 from Pooker.
On right there are list of zip files it's in the one labeled Templates #21 - 40 zip.
Optional Plug-ins, Filters Factory - Border Noisy Fade III
Colors I used, 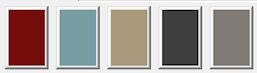

Open template and shift D. Close original and delete info layer.
Delete heart layers as well.
Select mask layer and add new layer. Flood fill with color. Go back to mask and float layer then invert and hit delete on color layer you made.
Close original mask layer.
Select circle layer and float then add new layer and flood fill with color.
Close original circle layer but keep selected and invert.
Paste star pattern and hit delete.
Invert again and using a darker color than circle with texture fill new layer.

Select none.
Merge rectangles together and float then add new layer and flood fill with color.
Apply filter factory c - border noisy fade with default settings.
Add text of choice and apply gradient glow. 3,25,100 white.
Select shape layer and float then add new layer and fill with color.
Invert and paste tube and hit delete.
Do this for other shape but mirror tube and change color of fill.
Using star preset shape foreground close background on black - draw out a small star - center - then convert to raster layer and apply mura's meister - copies.

Crop selection of about 5 or so stars and place where heart layer was. Duplicate and place where other layer was.
Merge together. Float then add new layer and flood fill with color of choice.
I didn't close original star layer this time as it looks better with both.
Paste tube layer and crop bottom off so it's even with circle. To do this duplicate tube layer so there are two. Select and float circle layer and invert. on bottom tube layer hit delete. Select none. On top tube layer crop bottom. Merge both tubes together.
Ann name and apply gradient glow.
Add drop shadow to layers.
Add copy right info.
No comments:
Post a Comment