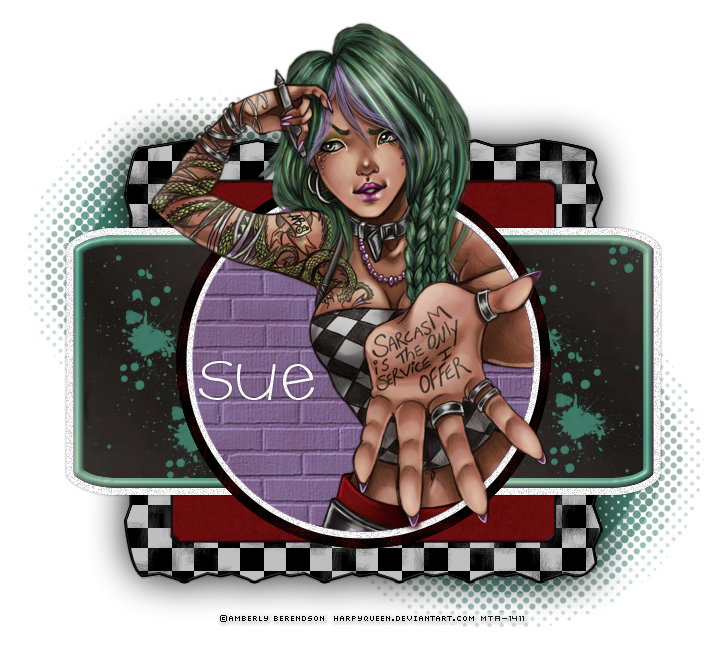
This tutorial is for those with a good working
knowledge of psp and was writen by me.
Supplies Needed
Tube(s) of choice, I used ©Amberly Berendson at MTA.
Font of choice, I used Scrap Round.
Template: Collab Temp - Kaci and Aqua.
Plugins: Unplugged Shapes - Checkered Flag.
Mura's Meister - Cloud
Let's Begin!
Open Template and Shift D and close original.
Delete info and word layers.
Materials Pallet - two colors from tube.
I used #48987d and #326456.
Add new layer and select/float and go to effects
mm-cloud and apply.
select none and send to bottom.
Select halftone layer and float then invert
and on layer we made hit delete.
Close original.
Select shape layer - duplicate and float then go to effects
unplugged shapes - checkered flag and apply but
change scale to 25.
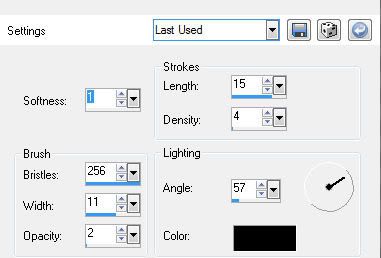
Keep selected and apply art media effect - brush stroke
using these settings...
Select original layer and float then
expand by 2 and add new layer flood fill with
black and then contract by 3 and hit delete.
Move above checkered layer.
On original layer apply gaussian blur - 20.
Make sure this layer is below the others.
Select pink square and float and add new layer
and flood fill with #670d0d.
Texture Effects - Fine leather with these settings...
color:black
angle:30
blur:0
transparency:250
number of furrows:41
Length of furrows:6
Select pink rectangle and float and add
new layer and flood fill with #48987d.
Add inner bevel.
Select black rectangle and float and add
new layer and flood fill with #2b2724.
Keep selected and add new layer
and using a brush of choice add a few
splotches here and there.
Select black circle and float then add new layer and
using air brush with #670d0d make a
few sprays where you like.
Select none.
Select pink circle layer and float and add new layer
and flood fill with #9a7aab then go to
textured effects - bricks size 100.
Keep selected and invert.
Add tube and place where you like then
duplicate.
On bottom one hit delete.
Using eraser tool erase areas on top tube layer.
Add name and add noise 20.
Add drop shadow to layers.
Add copyright info.
You're Done =)


No comments:
Post a Comment