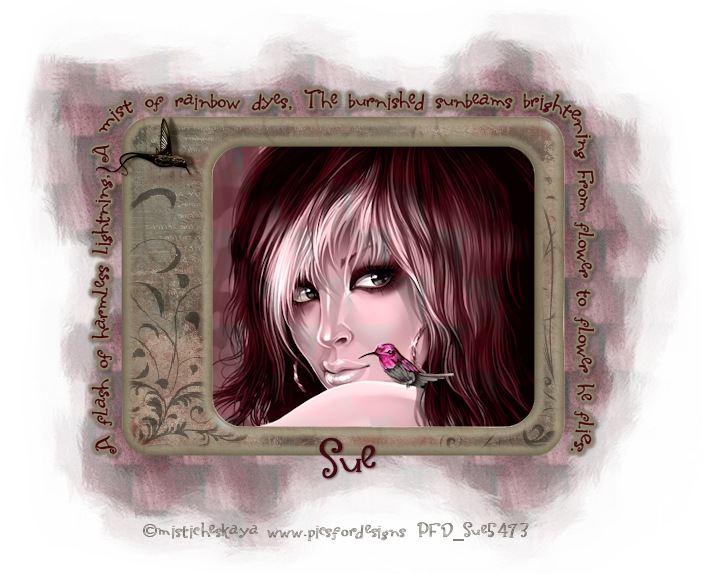
This tutorial was written by me and for those
who have a good working knowledge of psp.
Supplies Needed
Tube of choice, I used artwork by misticheskaya at PFD.
Frame:Grunge Frames from ZiggyFan Designs.
Font of choice, I used Yippy Skippy Alt.
Mask: # 210 from Insatiable Dreams.
Plug-In : Filters Unlimited 2 (optional)
Eye Candy 4 - Gradient Glow (optional)
Open New Canvas size 700 x 650.
Paste Grunge Frame and center in canvas.
Using Selection Tool - Rectangle
draw a rectangle larger than the opening in frame.
Add new layer and flood fill with color from tube.
I used #884952. Move to bottom.
Selections - Invert.
Paste tube or image and place where you like it.
Hit delete.
If using same tube as myself ...
Change Opacity to Luminance Legacy.
Using Selections tool - point to point
Outline the hummingbird on shoulder and her eyes.
Edit - copy and paste as new layer.
Place where they go.
Then paste Hummingbird from tube layers.
You will have to crop just the one hummingbird
and mirror and place.
Add dropshadow to hummingbird tube.
I used -1 / 7 / 50 / 3 black.
For mask layer - I copied a part of my tubes hair
and pasted as a new image in psp and moved it to one
side and duplicated and moved that one to other side
and so on untill all of the layers is filled with
different bits of the image and then I merged visible.
Then Effects - Image Effects - Seamless Tiling.
If you like the look of it then back to tag.
In Materials Pallet change either foreground or
background to pattern we just made.
Add New Layer and move to bottom.
Flood fill with pattern.
Apply Mask and merge group.
Apply Filters Unlimited 2 - paper texture -
mineral paper limestone.Add new layer and place below mask layer.
Flood fill with white.
Look at mask layer and if any outline is showing use
eraser tool and just erase.
(my pet peev as I hate straight line edges so totally up to you lol)
Preset shapes tool - rounded rectangle
Draw a rectangle just a bit larger than the frame.
Keep layer as a vector layer and using text tool click when you see
the A with half cirle and add your text. If this is not
positioned where you like it play around with space bar
or where you start the text to begin with.
My Text Saying...
A flash of harmless lightning.
A mist of rainbow dyes.
The burnished suneams brightening.
From flower to flower he flies.
Once you have text where you like it
convert it to raster and add gradient glow
changing default settings of width to 5
and color to #8e846d.
Add dropshadow using settings 1 / 1 /50 / 3.
Add name and copyright.
You are done!
I am sure there are many different and maybe
easier ways to get same effect I did but this is
just the way I do it. =)


No comments:
Post a Comment