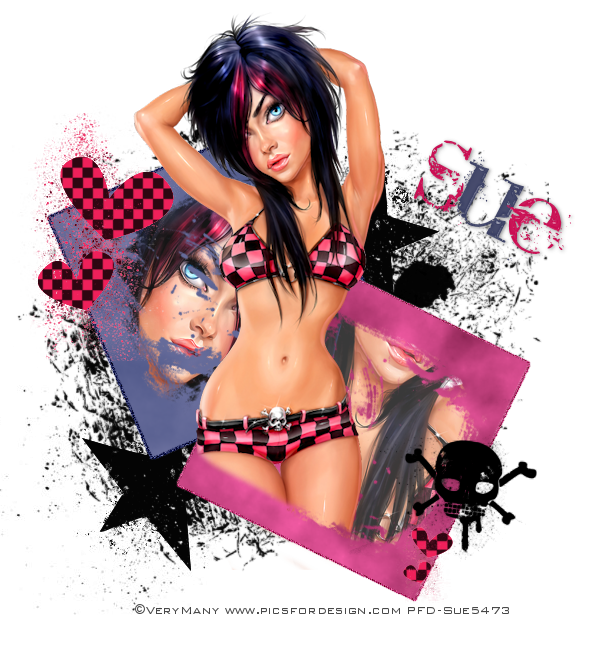
This tutorial was written by me and for those
who have a good working knowledge of psp.
Supplies Needed
Tube of choice, I used artwork by VeryMany.
Template : #22 from Creative Disorder.
Font of choice, I used PlAGuEdEaTH.
Plug-In : Mura's miester - cloud.(optional)
My Supplies: checkered layer.
Let's Begin!
Open template and shift D and close out original and delete word art layers.
In materials pallet set your colors to a dark
and lighter of same shade from tube.
I used #3a3f64 and #5e6494 for my left square.
Add raster layer and go to MM-cloud plugin and default settings and hit okay.
Select Square layer and float then invert and move cloud
layer where you like it and hit delete. Close original layer.
Do this again with two different colors from tube.
I used #ae366e and #dd6ba1 for my right square layer.
Once you have those done and original layers closed, select
your magic wand and click outside of the square frame you just made.
Invery and Modify - expand by 1
Add new layer and flood fill with the dark or darker color.
Modify - contract by 3 - delete.
Move this layer below your frame layer.
Repeat this again for other square layer.
Paste tube and resize and place where you want it.
Duplicate and move this layer down under the frame layer.
On top layer of tube using eraser tool delete thetube where the frame edge is
so it looks like she is coming out of frame.
On bottom tube later delete the excess below frame as well.
On the white sqares layer select and float layer and paste tube how you like it and hit delete.
Lower opacity to around 80.
On the right white square it sticks out from under the frame,
just crop the part sticking out.
For the hearts layer float them and add a new layer and flood fill
with color of choice.
Invert and paste the checkered layer I supplied and hit delete.
You may want to resize the checkered layer first.
I lowered my opacity of checkered layer to 80.
Add Name - for mine I typed out my name using pink color and then highlighted the "u"
and changed the color before I applied changes.
Rotate to your liking.
Add drop shadow to layers.
Add Copyright Info.
You are done!


No comments:
Post a Comment