This tutorial was written by me and for those
who have a good working knowledge of psp.
Supplies Needed
Tubes, I used artwork by ©Suzanne Woolcott
Scrapkit, I used PTU Honey Pot by Designs by Sarah
Font of choice, I used Arial.
Plugin, I used Penta - color dots.
Let's Begin!
New canvas 800 x 700.
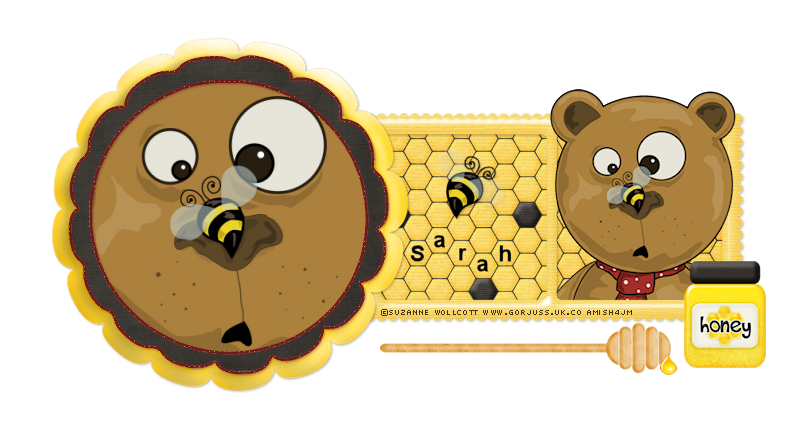
Refer to my tag along the way.
Paste frame 1 and move to center but more to right.
Paste frame 3 and move to the left of frame 1.
Using magic wand select the white part of frame 3.
Modify - smooth by 10.
Add new layer and fill with color.
I used #701918.
Then I applied the filter penta - color dots with distance of 5.
Modify - contract by 3
Hit delete.
Modify - expand 1
Invert
Paste paper 12
Hit delete.
Move this layer under the other layer we made.
Using magic wand click inside the circle part of frame 3.
Modify - expand by 6.
Invert
Paste large tube and hit delete.
Using magic wand select inside the squares on frame 1.
Modify - expand by 3.
Invert.
Paste paper 2.
Hit delete.
Keep selected.
Paste smaller tube and place inside the right square of frame 1.
Duplicate and move one above frame and one below frame.
Erase bottom part of the top copy.
Paste the bee tube if using same as me.
Mirror.
Paste any other elements of choice from scrap kit.
Add name.
I thought the name looked nice in the honeycomb
so type name out and apply.
Keep vector.
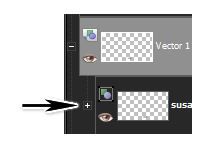
Go to layers pallet and click the plus sign.
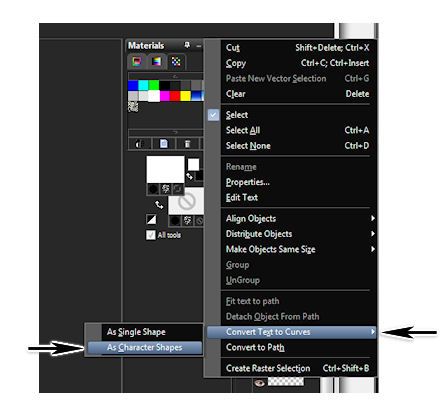
Then right click name and select convert text to curves then as character shapes.
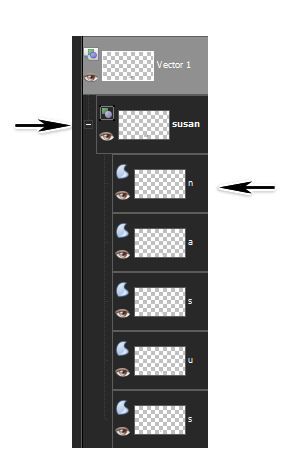
Now click the plus sign by name.
Now you should see each letter of your name as single.
Just click each letter and move where you
like it making sure text tool is still highlighted.
Add drop shadow to layers.
Add copyright info.
Save.
Add drop shadow to layers.
Add copyright info.
Save.


No comments:
Post a Comment