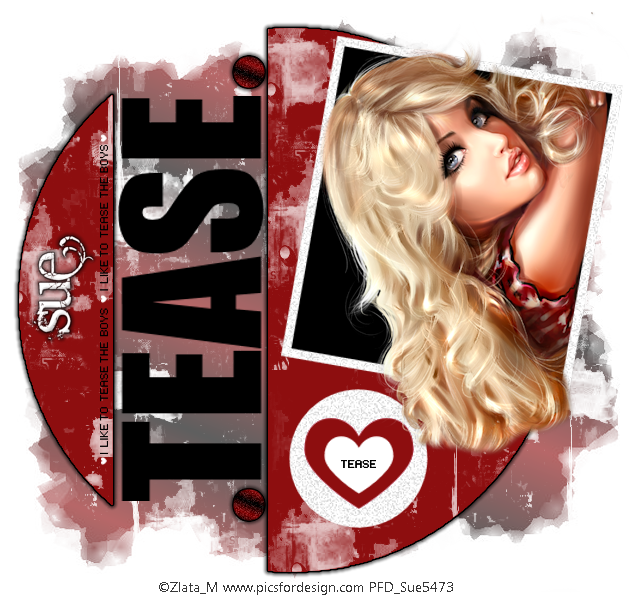
This tutorial was written by me and for those
who have a good working knowledge of psp.
Supplies Needed
Tube of choice, I used artwork by © Zlata_M.
Template : #282 by Missy.
Font of choice, I used Angelic War.
Plug-In : Eye Candy 4000 - gradient glow.(optional)
My Supplies -mask layer and brush.
Let's Begin!
Open template and shift D and close out original and delete info layer.
Open my supplies - on splotch brush
go to tools - paint brush and create brush.
Colors I am using are White, black and #8d0e0f.
Paste tube and place where you would like it.
I rotated mine 90 degree left.
Duplicate tube once you have it where you like it.
Move one below frame layer and one above.
Select square bg layer and float and then invert
hit delete on bottom tube layer.
On top tube layer using eraser tool crop
parts of tube so hair is out of frame.
Use mine as a guide if needed.
Add drop shadow.
Select circle bg and float.
Add new layer and flood fill with #8d0e0f.
Add new layer again and using brush set to white
add splotches and lower opacity to 75.
On red layer add gradient glow 5/25/100 black.
Select Heart layer and float and on new layer
flood with #8d0e0f.
Select text on heart and float and flood fill
with black on new layer.
Select pink circles and float and
on new layer flood fill with gradientof #8d0e0f and black then add noise
and add gradient glow same as before.
Paste mask I provided.
Add name - for mine I duplicated name and added gradient
glow like before to bottom one and lowered to 75.
Add copyright.
That's it!


No comments:
Post a Comment