This tutorial was written by me and for those
who have a good working knowledge of psp.
Supplies Needed
Template : Collab Temp by Alisha and Tina.
Font of choice, I used scrap round.
Plug-In : PhotoEffex - Scanlines (optional)
My Supplies -background layer and text.
Let's Begin!
Open my supplies - minimize for now.
Colors I am using are #ddd8c3, #334b7a, #221509 and #14161e.
Open template and shift D and close out original and delete info layer.
There are several layers I deleted - look at mine for reference.
Should now look like this...
Make canvas size larger for working - resize later.
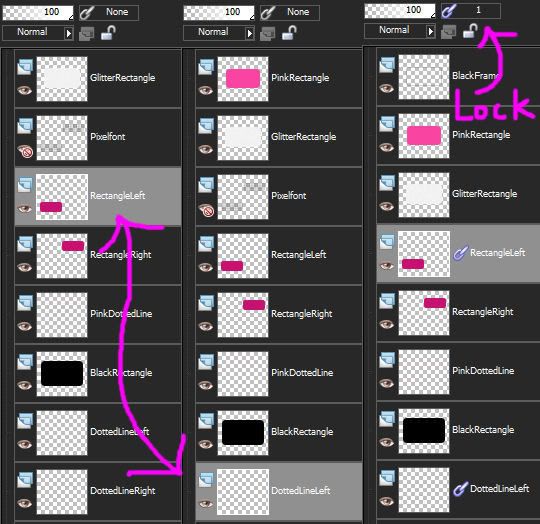
Click rectangle left and dotted line left
and lock and then do the same for the right.
Move those like I have mine (look at my tag) - right goes up and left goes down.
Select pink rectangle and float it and flood with #221509.
Invert and paste head tube and hit delete.
Do this untill rectangle is filled.
Select none and then mirror.
Lower opacity to 30.
I also added photoeffex - scanlines default setting to mine.
Select black rectangle and float and add new ayer
and flood fill with color #14161e.
Do this for the small rectangles
as well using the color #334b7a
and the glitter rectangle using #ddd8c3
and the black frame layer using the color #334b7a.
Close all the original layers or delete them.
Select the pink dotted line and float
and on a new layer flood fill or an easier way
since the dots are so small open new image and flood
fill with the color #ddd8c3 and then copy and
then go back to tag and paste into the new layer
you added.
Add tube.
Add background layer I supplied and the text.
Add name and lower opacity to around 70.
Add copyright.


No comments:
Post a Comment