

This tutorial is written for those that
have a working knowledge of PSP.
You will need...
Tube of choice, I used artwork by Suzanne Woolcott
and you can purchase her work HERE.
Mask is EBDMask52
(in supplies)
Whisper Softly scrap kit by MoMo/Country Style Designs.
http://countrystyledesigns.com/store
This is just a great kit to have. So many possibilities.
Thanks MoMo!
Font I used was Riesling
You can get it HERE.
I made the wand and wordart
You can get them, animation, and the mask HERE.
Okay, here we go...
Remember to save often!!!
Open a New Canvas 700 x 700
Resize Later.
Flood fill with White.
Open Supplies.
I use animation shop / browse /csd_whisper softly
That way I can see everything and not have to open each layer in psp.
Do whatever is best for you.
Copy and Paste the WS Cart
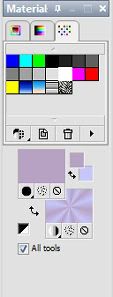
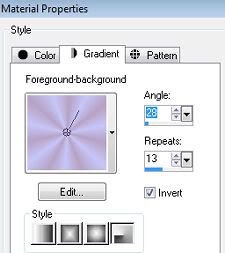
Pick two colors from cart and make a gradient in the Materials Pallete.
Flood Fill New Raster Layer with Gradient.
Apply Mask.
Layers - Merge Group
Make Sure this layer is right above white bg layer.
On Cart Layer
Magic Wand / Click on Outside of Cart
Paste a Paper of Choice
I used paper 7.
Hit Delete.
Select None.
Move Layer beneeth Cart Layer.
Lower Opacity to about 40 or where ever you like it best.
Go back to Cart Layer.
Magic wand / Click inside the Heart
Invert
Paste paper and hit delete.
Select None.
I used paper 7 again but changed color.
Hue and Saturation / Colorized / 62 , 61
I also added Art Media / Brush Strokes

Add Tube of choice and postion where you like.
Crop any excess.
Add Wordart and Wand.
Make sure you move wand layer right below
tube layer so it looks like wand is in hand.
Add Copyright
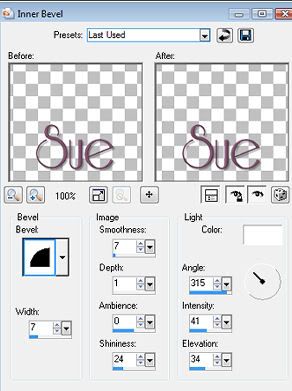
Add Name.
I added inner bevel.
Add a drop shadow of choice to your layers.
Resize.
Save as desired.
ANIMATED TAG
If you would like to animate this tag like mine HERE
Go to AS and open the animation I supplied in supplies
I resized animation for my tag.
Go back to PSP and Copy Merged
Back to AS and paste and hit Ctrl L until you have 16 layers.
On Animation Select All and drag to where you like it placed on wand.
Save as a gif.
Hope you enjoyed my tutorial.
have a working knowledge of PSP.
You will need...
Tube of choice, I used artwork by Suzanne Woolcott
and you can purchase her work HERE.
Mask is EBDMask52
(in supplies)
Whisper Softly scrap kit by MoMo/Country Style Designs.
http://countrystyledesigns.com/store
This is just a great kit to have. So many possibilities.
Thanks MoMo!
Font I used was Riesling
You can get it HERE.
I made the wand and wordart
You can get them, animation, and the mask HERE.
Okay, here we go...
Remember to save often!!!
Open a New Canvas 700 x 700
Resize Later.
Flood fill with White.
Open Supplies.
I use animation shop / browse /csd_whisper softly
That way I can see everything and not have to open each layer in psp.
Do whatever is best for you.
Copy and Paste the WS Cart
Pick two colors from cart and make a gradient in the Materials Pallete.


Flood Fill New Raster Layer with Gradient.
Apply Mask.
Layers - Merge Group
Make Sure this layer is right above white bg layer.
On Cart Layer
Magic Wand / Click on Outside of Cart
Paste a Paper of Choice
I used paper 7.
Hit Delete.
Select None.
Move Layer beneeth Cart Layer.
Lower Opacity to about 40 or where ever you like it best.
Go back to Cart Layer.
Magic wand / Click inside the Heart
Invert
Paste paper and hit delete.
Select None.
I used paper 7 again but changed color.
Hue and Saturation / Colorized / 62 , 61
I also added Art Media / Brush Strokes

Add Tube of choice and postion where you like.
Crop any excess.
Add Wordart and Wand.
Make sure you move wand layer right below
tube layer so it looks like wand is in hand.
Add Copyright
Add Name.
I added inner bevel.

Add a drop shadow of choice to your layers.
Resize.
Save as desired.
ANIMATED TAG
If you would like to animate this tag like mine HERE
Go to AS and open the animation I supplied in supplies
I resized animation for my tag.
Go back to PSP and Copy Merged
Back to AS and paste and hit Ctrl L until you have 16 layers.
On Animation Select All and drag to where you like it placed on wand.
Save as a gif.
Hope you enjoyed my tutorial.
No comments:
Post a Comment