Saturday, July 1, 2017

Deceived & Betrayed


This tutorial was written by me and for those
who have a good working knowledge of psp.

Supplies Needed


Tube
Artwork by ©Andreea Cernestean at CDO..

Font
Arnetalia view

Cluster Frame

Mask Of Choice


.....................................................................


Okay, let's get started
Remember to save often!!!

Open cluster and shift D
Close original

Resize canvas to 800 x 800
Crop at end


Paste pattern below and apply mask


Merge group

Select frame are with selection tool
Add new layer
Ctrl Shift L (paste into)

Add tube
Duplicate
Move one above frame and one below
Crop bottom part off both layers
On top layer crop all but head area so looks like coming out of frame

Add name

Add CR info

Crop & Save

Ocean Garden


This tutorial was written by me and for those
who have a good working knowledge of psp.

Supplies Needed


Tube
Artwork by © The Vintage Angel at CDO..

Font
Anthem

Cluster Frame
.....................................................................


Okay, let's get started
Remember to save often!!!

Open cluster and shift D
Close original

Resize canvas to 800 x 800
Crop at end

Add tube
Duplicate
Move one above frame and one below
Crop bottom part off both layers
On top layer crop all but head area so looks like coming out of frame


Add name

Add CR info

Crop & Save

All Geared Up


This tutorial was written by me and for those
who have a good working knowledge of psp.

Supplies Needed


Tube
Artwork by ©Michael Calandra at CDO..

Font
Almibar Swash 1

Cluster Frame

.....................................................................


Okay, let's get started
Remember to save often!!!

Open cluster and shift D
Close original

Resize canvas to 800 x 800
Crop at end

Add tube
Duplicate
Move one above frame and one below
Mirror top tube
On bottom one position below the glass how you like it
Duplicate top tube again
Select mask layer
Invert
Delete on top tube
Erase part of the bottom on the other tube

Use my tag as guide

Add name

Add CR info

Crop & Save

Friday, June 30, 2017

Photobucket Charging

Due to Photobucket now charging $399.00 to use, all my old images are gone off site.
I am not going to pay that to get them back up and running. I will try to update some in time but for now only new images will be showing. 
Sorry!

Wednesday, May 31, 2017

Zollie


This tutorial was written by me and for those
who have a good working knowledge of psp.


Supplies Needed


Tube
Artwork by ©Enys Guerrero at CDO..

Font
VTC Night Of The Drippy Dead

My Supplies

.....................................................................


Okay, let's get started
Remember to save often!!!

Open new canvas to 800 x 800

Open my supplies and shift D

Paste mask layer into new canvas

Paste bg layer into new canvas and place where you like it

Paste frame and center over bg layer

Paste tag and move where you like it

Paste tube of choice
If your tube doesn't fit frame area crop or move below frame and crop

Add name

Add CR info

Crop & Save

Not much to this tutorial since I supplied elements for you but feel free to add more stuff or colorize or do something unique to make it your own


Last One Standing

 photo last one standing.png
This tutorial was written by me and for those
who have a good working knowledge of psp.


Supplies Needed


Tube
Artwork by ©Nicole Brune at CDO

Font
bang whack pow

Filter
Xenofex - Shower Door

.............................................................

Okay, let's get started
Remember to save often!!!

Open new canvas 800 x 800
Crop when tag is done to your liking

Use my tag as guide if needed

Using brush tool and gradient of choice
I used two colors from my tube as gradient
Paint an area on your canvas

Effects - Distortion
Twirl
720

Apply shower door filter

Repeat Twirl again

Apply Mosaic - Antique
Default Settings

So now you should have a twirl similar to mine

Paste tube
Place where you like it
Float twirl layer
Invert
Delete tube layer

Paste close up tube and do same steps from above again


Add name
Give it a bevel and shadow of choice

Add CR info

Crop & Save

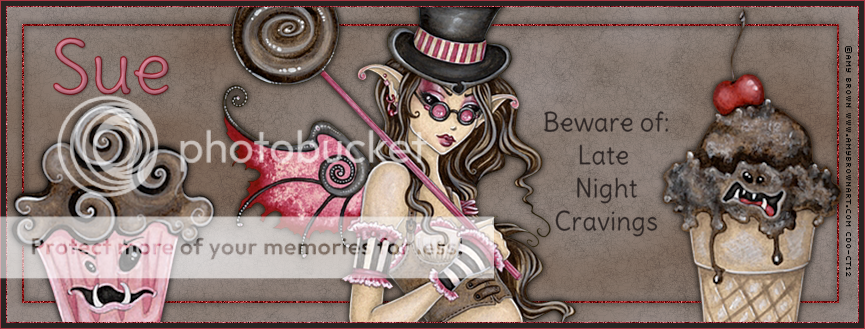
Late Night Cravings


 photo late night cravings.png
This tutorial was written by me and for those
who have a good working knowledge of psp.


Supplies Needed


Tube
Artwork by ©Amy Brown at CDO 

Font
Delius

Filter
Mura's Meisters - Clouds


.............................................................................................

Okay, let's get started
Remember to save often!!!

Open new canvas 851 x 315

Select two colors from tube and make one foreground and the other background colors
Fill with one color
Apply cloud filter

Duplicate

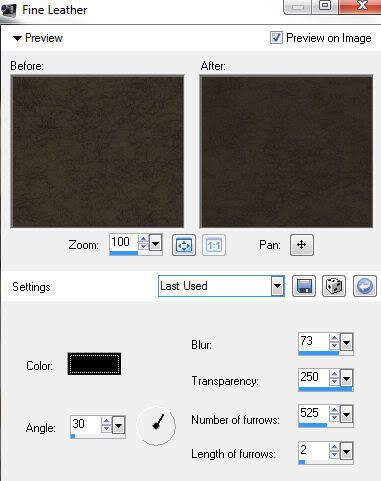
Apply fine leather effect if desired or any other effect of choice or filter
My fine leather settings are as shown
Photobucket

Lower opacity if to dark
(that's why we duplicated layer)

Using selection tool - rectangle
draw out a rectangle smaller than background
Look at my tag for guide if needed

New layer - fill with color of choice
Contract by 2
Delete
Add noise

Add drop shadow


Paste tubes where you like and give them a drop shadow

Add text

Add border of 1 in same color as you added earlier
Magic wand - select
Add noise
Select none

Add border again and this time dark color at 5

Add border using color as before set at 1 again
Add noise

Add name
Give it a bevel and drop shadow of choice

Add copyright info

Save

Saturday, April 29, 2017

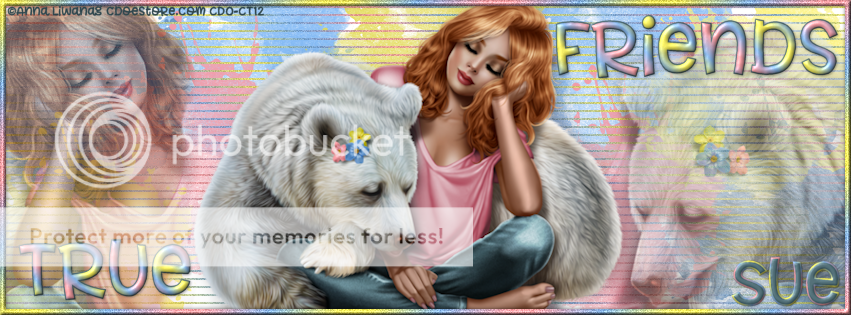
♥ True Friends ♥


 photo true friends.png

This tutorial was written by me and for those
who have a good working knowledge of psp.


Supplies Needed


Artwork by  ©Anna Liwanag at CDO

Font
Allspice

Filters
Richard Rosenman - Scanlines

Brushes
(optional)
Any Splatter Brushes will do
Find some HERE


..........................................................................


Okay, let's get started.
Remember to save often!!!

Open new canvas 851 x 315

Make a gradient using colors from tube you are using
I used the three color of the flowers in my tube

Once you have a gradient made flood fill canvas
Ctrl A
Contract by 6
Delete
Add noise at about 25
Add bevel of choice

Add new layer
Fill with white

Apply scanlines filter to layer using settings of
Spacing 7
Thickness 2
Color from tube

Using magic wand click the lines you made
Add new layer
Fill with gradient
Select none
Add noise at 20 or so

Go back to original white layer with lines
Click Delete
Flood fill with white again

Add new layer
Using a brush of choice add splotches of colors from tube around layer
This layer should be under the lines layer but if not move below

Paste tube of choice
Resize to choice
Center

Paste tube again and mirror
Duplicate
Move one to one side and the other to other side
Merge together and lower opacity to desired look
Using eraser tool set to 11 opacity
Erase parts of tube on both sides
So on mine - on the left I erased the bear and on the right I erased the girl

Add drop shadow to tube layer 

Add text of choice
I used my gradient with and outline using her pants as color option
Add bevel of choice
Add drop shadow of choice

Add name and do same
I just switched my colors around for name and made a bigger outline

Add copyright info

Crop & Save


Do same steps with canvas of 160 x 160 to make an avitar
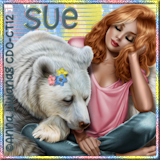
 photo true friends avi.png

Hope you enjoyed my tutorial. I am sure there are many ways to do the same things I did but easier, it's just this is the way I do it so if you have your own ways of doing same thing, feel free to do your way.

Monday, April 17, 2017

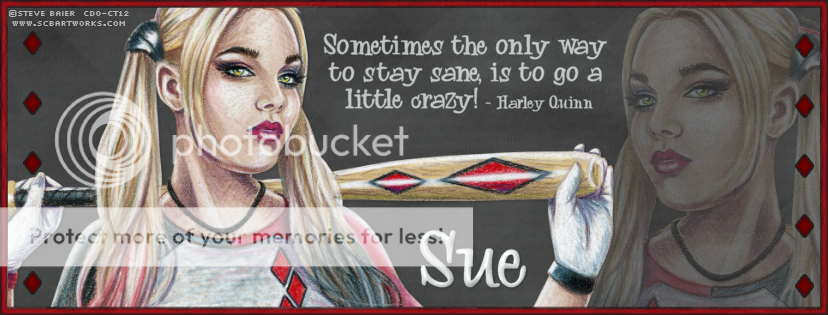
♦♦ Harley Quinn ♦♦

 photo harley quinn.png
This tutorial was written by me and for those
who have a good working knowledge of psp.


Supplies Needed


Tube
Artwork by ©Steve Baier at CDO

Font
 Whoa DNA

My Supplies


......................................................................................

Okay, let's get started
Remember to save often!!!

Open my supplies
Shift D
Close original

Paste tube and move to the left
Duplicate and mirror image
Move to the right
I cropped my duplicate tube so bat was deleted
Lower opacity to 25 or where you like it

Now move my supplies around where you like them
I supplied diamonds that match the tube I used but also grey ones to be colored if you aren't using the same tube as me.
I also added a gradient glow to mine in black so it gave them the look to match tube diamonds so this is up to you
Whichever diamonds you use just delete the other ones

Move quote to where you like it or add quote of your own

Add name

Add drop shadow to layers

Add copyright info 

Crop & Save

Simple tut but the possibilities are endless with different tubes and colors.

.......................................
 photo harley quinn avi.png
Also if you want to add profile pic to match

Open new canvas 160 x 160

Paste bg layer into canvas

Paste frame
Move so upper left corner of frame is in the corner
Duplicate and do same for bottom right corner

Paste tube

Add name

Add copyright info

Save


Tuesday, April 11, 2017

Coloring Book

 photo coloring book.png


This tutorial was written by me and for those
who have a good working knowledge of psp.

Supplies Needed


Tube
Artwork by by ©Linda Biggs at CDO

Font
Arnetalia view

My Supplies

...........................................................

Okay, let's get started
Remember to save often!!!

Open new canvas to 800 x 800
Crop after tag is done

Paste  book
Place in center of canvas

Paste tubes and place on both sides of book

Paste my supplies and move where you like them

Now go back to tube on right 
Select a portion of your tube and promote as layer
Go back and delete on other layer
Adjust - Colorize - S at 0 H at 0

So now a section of your tube should look like it's not colored yet

Add name 
I used a rainbow gradient

Add drop shadow to layers of choice

Add copyright info

Crop and Save