

This tutorial is written for those that
have a working knowledge of PSP.
You will need...
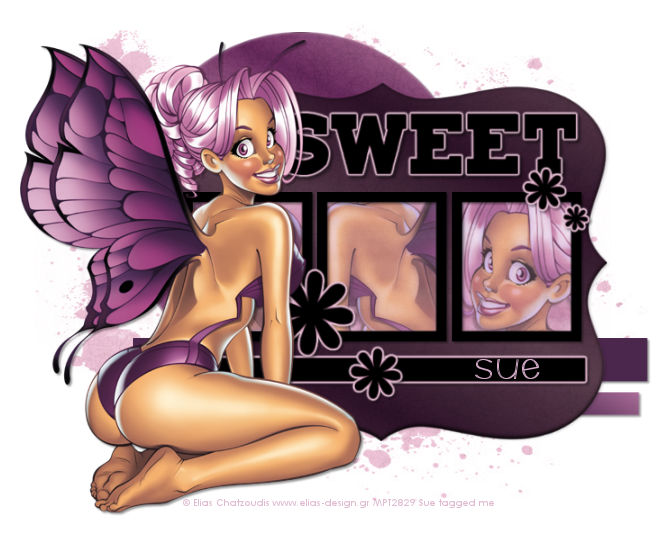
Tube of choice, I used artwork by Elias Chatzoudis
and you can purchase his work HERE.
Don't use same tube unless you purchase it.
Template #10 from Teresa's.
You can get it HERE.
Mask you can get that HERE.
No Scrap Used.
You can use one if you would like.
Eyecandy4000 / Gradient Glow
Xero / Pocelain
Font I used was Scrap Round
Okay, here we go...
Remember to save often!!!
Open template and shift D and close original.
Go to image / canvas size / 700 x 700
Flood fill with a color from your tube
apply mask
Layers - Merge Group
Select Circle layer / Float
New Raster Layer /Flood Fill with a different color from tube.
(we will be doing the above steps for all layers)
Effects / Texture Effects / Fine Leather
Color Black / Blur 10 / Transparency 250 / Furrows 50 / Length 6
Apply.
Select None.
Close out original layer.
Select Black Layer
Float / New Raster Layer / Flood Fill
I used gradient of two colors from tube.
Apply same Fine Leather Effect
Select None.
Lower Opacity to around 44.
Leave Original layer showing.
On Bottom Strip Layers
Select / Float / Flood Fill
Select None.
On Top Strip Layer / Sweet Word Layer / Flowers
Select / Float / Flood Fill
Select None.
EyeCandy / Gradient Glow
3 / 25 /100
color from tube
On Frame BG Layer
Select / Float / Flood Fill
Select None.
Add Tube
Place where you like it.
Duplicate and Mirror then drag below frame outline layers.
Select Frame BG Layer
Float / Invert
Go back to duplicated tube and hit delete.
Do this for all three spots.
Effects / Xero / Porcelain
Default Settings.
Lower Opacity to about 67.
Do for all three layers.
Add Copyright
Add Name
Add a drop shadow of choice to your layers.
Save as desired.
Hope you enjoyed my tutorial.


